
Ring Light
March 29, 2016
My friend Alex, who is a professional photographer, wanted to build a ring light, which is a roughly 2′ diameter ring of lights that you shoot through to create an effect like this:

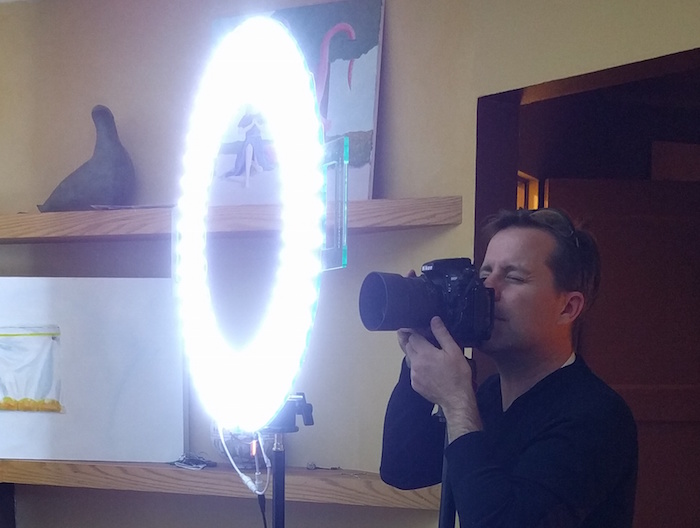
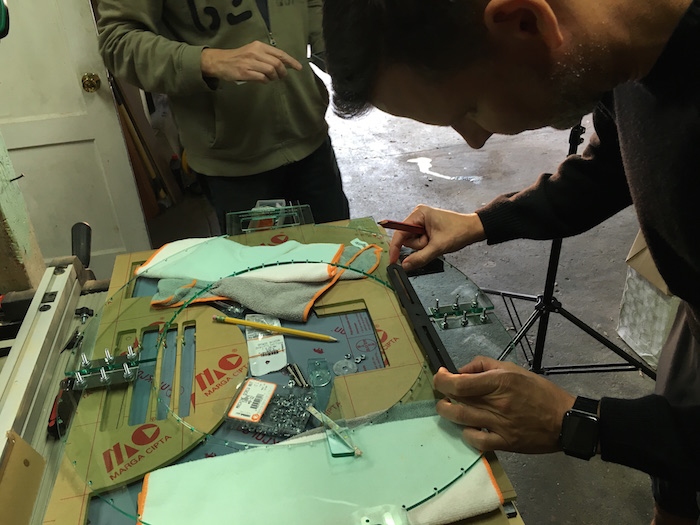
I enlisted the help of our friend Matt (pictured above) and we spent a Saturday assembling it. This is Alex shooting through it:
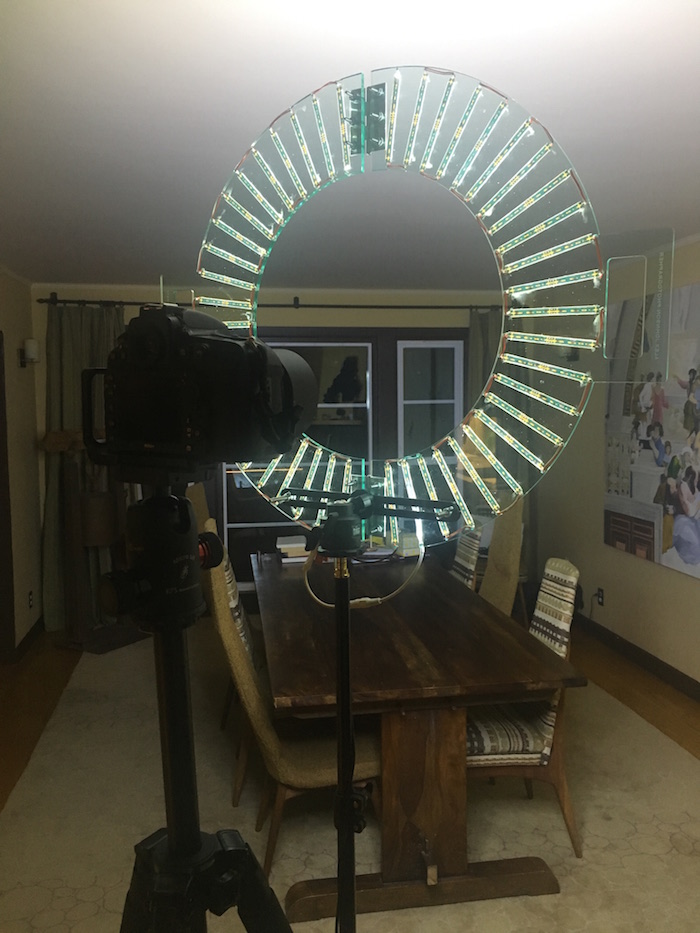
This is what it looks like from the back:
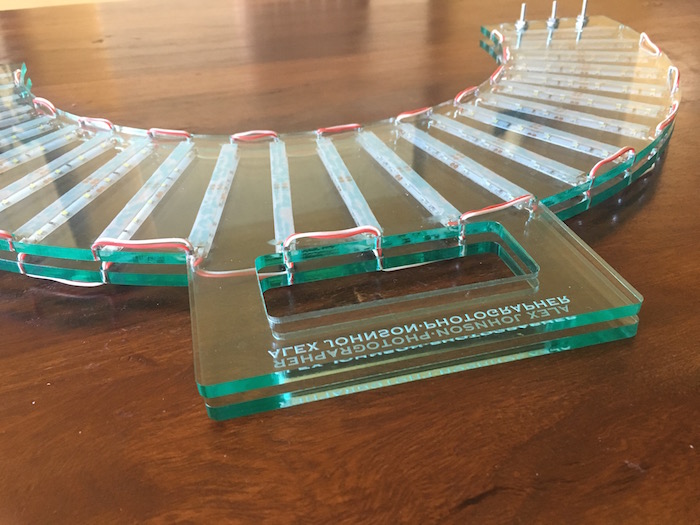
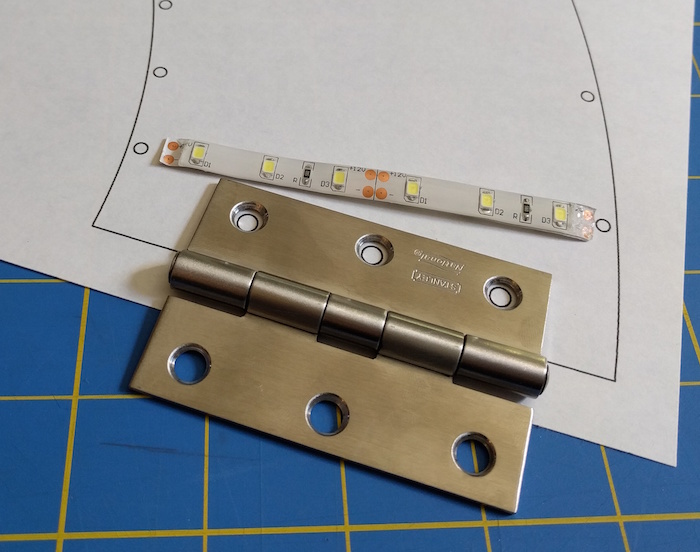
The lights are short LED strips cut from a 16′ reel. The ring itself is cut from ¼″ acrylic in two sections, with hinges in the middle so that the whole thing can fold in half, and with handles for easy carrying:

This was my first time using clear acrylic with a green edge. It looks a lot like glass. I highly recommend it:
I designed the ring in Adobe Illustrator and cut the acrylic at TechShop on the laser cutter. The ring itself is 4½″ wide and 23″ across. (The laser cutter is only 24″ wide and it's good to leave a margin because the accuracy of the absolute position can be poor.)
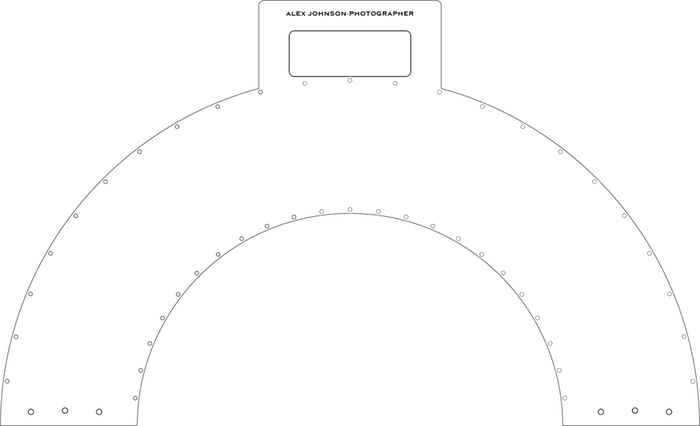
I first printed the design on paper to make sure the hinges and LED segments would fit:
A flash bracket holder was used to mount the ring to the tripod. We positioned it at roughly the right place and drilled two ¼″ holes. (Normal camera mounts are ¼″-20, so we just used that.) Be careful when drilling acrylic, it shatters easily. Start with the smallest bit you have, go slowly, and increase bit size in small steps. In this photo we're experimenting with different locations. We ended up moving it down lower, across the middle of the hinge, and leaving out the middle two bolts of the hinge:
Here's the acrylic cut and mounted on the flash bracket holder. Note the ball head to hold the bracket sideways:
![]()
The power comes in at the bottom and snakes through the LED sections to the top. It's better to split the power this way to minimize voltage drops. With a single linear section the voltage drops from 12.4 V to 9.4 V, but split in two the ends of each half are at 10.4 V.
The LED tape can be cut in 2″ sections and soldered back together. We cut them every 4″ and lay them down radially. For each segment, solder two short pieces of hookup wire, pass the wire through the small hole, pass it back up at the next section, and solder it there:
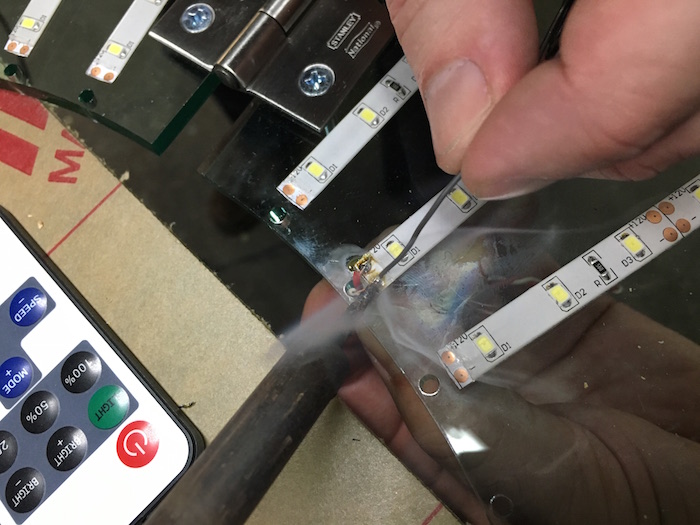
I recommend starting with the powered (initial) segment and plugging it in to make sure it works. Then turn it off, tape down another section, solder it up, and turn it on again to verify that the new section is working. Do that throughout so that if there's a short circuit or broken LED, you'll know right away. Here is ours after three sections:
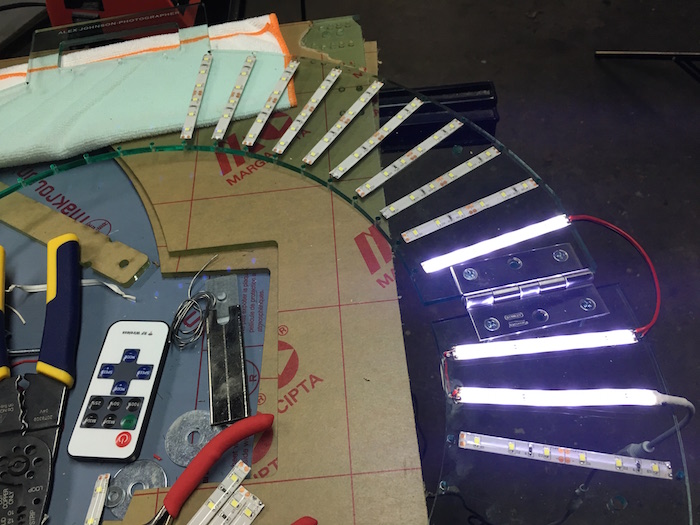
You can also lay the LED tape down concentrically. It's much easier to do that (no cutting, removal of weatherproofing, or soldering), but you may have trouble getting the tape to turn at this radius, especially with the weatherproofing. It also makes it impossible to fold the ring in two, and I think it looks less professional.
Here's the material list:
- Daylight waterproof LED strip. The length was perfect, as was the color. We had two bad 2″ sections, but the 16.4′ gave us a few to spare. I'm not sure whether the weatherproofing was a good idea. It was very tedious to remove it to solder the sections together, but it's nice to have it on the final product, for both looks and physical protection. Factor in a few extra hours if you include it.
- Power supply.
- Dimming remote. Definitely get this, you don't want to be unplugging the thing to turn it off. Also the dimming is great because the full brightness is blinding.
- Flash bracket holder. We mounted this sideways on the tripod and drilled holes right in the acrylic to keep it upright using ¼″-20 bolts and nuts.
- Two 3″ stainless steel hinges from hardware store. These needed #18-32 bolts (with flat heads), washers, lock washers, and nuts, also from hardware store.
- Electrical hookup wire. I used a spool I had laying around. For the individual pieces you can use solid or stranded, but for the piece that connects the two folding halves, you'll want stranded wire so that it doesn't break with repeated bending.
- Two 24″×18″ sheets of ¼″ clear green-edge acrylic.
The project came to less than $150.